Digging Deep: Crafting the Perfect Mix for Monster Pits in Tricky Gravel!
Hey There, Let’s Talk Dirt (and Gravel!)
Okay, so let’s talk about digging deep. Like, *really* deep. As our cities get bigger and surface space gets tighter, we’re heading underground. It’s like building a whole new layer of the city down there! But, as you can imagine, digging massive holes, especially super deep ones – what we call “ultradeep foundation pits” – comes with a whole heap of challenges. We’re talking complex geology, huge depths, and support structures that need to be absolutely spot-on.
Now, when you’re dealing with something this big and complex, just doing calculations or computer simulations isn’t always enough. Sometimes, you just gotta build a smaller version and see what happens. That’s where physical model tests come in. Think of it as a super-detailed, scaled-down sandbox experiment, but for serious engineering. It lets us watch how the ground behaves, how the supports work, and basically figure out the kinks before we break ground on the real deal.
But here’s the catch: to make these model tests useful, the stuff you build the model out of – the “similar material” – has to act *just like* the real soil or rock you’re dealing with. Getting that mix right is absolutely crucial. It’s the secret sauce that makes the model test actually tell you something meaningful about the real world.
The Gravelly Problem: Not Your Average Sandbox Material
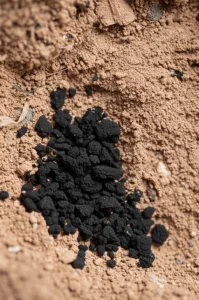
Most of the time, folks developing these similar materials focus on common soils like clay, silt, or sand. But what happens when you hit something a bit more… challenging? Like, say, the plateau alluvial and lacustrine (PAL) round gravel we encountered in a project in Kunming, China? This stuff isn’t your average backyard dirt. It’s got big, round particles, it holds a lot of water, and it’s super permeable.
So, what’s the deal with this round gravel? Well, its unique properties can cause some serious headaches when you’re trying to dig a deep pit. We’re talking problems like:
- Piles that don’t form properly.
- Holes that just want to collapse on you.
- Water rushing into anchor cable holes.
Yeah, not ideal when you’re trying to build something solid 33 meters down! This kind of tricky ground really highlighted the need for a similar material specifically designed for this PAL round gravel. Plus, while physical models are used for tunnels and slopes, applying them to ultradeep foundation pits, especially in this kind of gravel, felt like something that needed more attention.
Whipping Up the Perfect Batch: Our Material Recipe
Finding the perfect recipe for a similar material that mimics this specific gravel wasn’t just guesswork. We based our approach on something called similarity theory – basically, making sure our model behaves proportionally like the real thing in terms of geometry, material properties, and how forces act. We aimed for a geometric scale where the model is 100 times smaller than the real pit.
To figure out the best mix, we used a smart experimental design method called the orthogonal test (OT) design. This lets you test the impact of several ingredients and their amounts with a minimum number of experiments. Pretty efficient, right?
We gathered our raw materials:
- Dolomite sand (DS) and barite powder as the main “aggregates” (the bulky stuff).
- Gypsum and laundry detergent (LD) as binders (the sticky stuff).
- Bentonite as an additive (to fine-tune things).
- And, of course, water!
We chose dolomite sand because, unlike traditional quartz sand which is super hard, dolomite is softer. This helps the similar material have mechanical properties (like strength and stiffness) closer to what we needed for the gravel. Barite powder is heavy, helping us match the gravel’s density. Gypsum and LD work together to control the material’s cohesion (how much it sticks together). Bentonite helps with cohesion and density too.
We ran nine different mixes based on the OT design, carefully measuring out each ingredient. Then came the fun part: testing!

Testing, Testing: Finding Our Champion Mix
After preparing our specimens (carefully compacted into little rings, like tiny soil cakes!), we put them through their paces. We measured their density (γ), their cohesion (c), their angle of internal friction (φ – basically how well the particles resist sliding past each other), and their elastic modulus (E – how stiff they are). These are the key properties we needed to match to the real gravel.
We did direct shear tests to get c and φ, pushing one part of the specimen past the other under different weights. We did consolidation tests to get E, squeezing the specimens under increasing pressure and measuring how much they compressed.
We compared the results of our nine mixes to the properties of the actual PAL round gravel (scaled down according to our similarity theory rules, of course). And guess what? Mix number 6 was the closest match! It had the right balance of density, cohesion, friction angle, and stiffness.
So, the winning recipe for our optimum similar material turned out to be a ratio of:
Gypsum : LD : Bentonite : Water : Barite powder : DS = 1 : 1 : 1.4 : 3.5 : 8.8 : 13.2.
Peeking Inside: What Makes It Tick?
Once we had our champion mix, we wanted to understand *why* it behaved the way it did. We did a sensitivity analysis to see which ingredients had the biggest impact on each property. Turns out, barite powder was the boss for density (γ), bentonite was key for cohesion (c) and friction angle (φ), and the ratio of LD to gypsum really controlled the stiffness (E).
We also got fancy and used scanning electron microscopy (SEM) and X-ray diffraction (XRD) to look at the material up close – like, *really* close. SEM let us see the particle shapes, how they were connected, and the pores between them. XRD told us exactly which minerals were in our mix and the real gravel.
What we saw under the microscope was pretty telling. The particles weren’t perfectly uniform in size, and they often connected in “edge-to-face” ways rather than strong “face-to-face” contacts. There were also lots of small pores. These microscopic features helped explain why the material had relatively low cohesion and stiffness – the particles weren’t packing together perfectly or bonding super strongly everywhere.
Comparing the mineral content with XRD was also insightful. The real gravel had a lot of hard minerals like quartz and potassium feldspar. Our similar material, with its high dolomite content (which is softer than quartz), had a lower overall hardness. This confirmed our hunch that using dolomite sand instead of harder quartz sand was a good move for getting the mechanical properties closer to the target gravel.

Putting the Mix to Work: The Big Model Test
With our optimum similar material ready, it was time for the main event: the 3D physical model test of the ultradeep foundation pit. We built a model box – a sturdy steel frame with Plexiglas sides so we could see what was happening. We scaled down the actual foundation pit from the Kunming project (the influent pump station, designed to be 33 meters deep!) by our chosen factor of 100.
We filled the model box layer by layer with our similar material, compacting it carefully as we went. We also prefabricated the “slurry wall” (a common support structure for deep pits) and buried pressure sensors at key locations around and beneath where the pit would be. These sensors were our eyes into the stress field, telling us how the pressure in the soil changed as we dug.
The excavation process in the model followed the plan for the real pit: we dug it out in stages, layer by layer, and installed the internal concrete supports at the correct scaled depths. We had 20 steps of excavation across six main stages, installing five layers of supports as we went deeper. After each little bit of digging, we’d collect the data from our pressure sensors.

What the Sensors Told Us: Stress on the Move
Watching the sensor data as we excavated was fascinating. As we dug deeper and the internal supports went in, the stress in the surrounding soil changed dramatically.
On the sides of the pit, the horizontal pressure eased off – it was being “released” towards the newly excavated space. The sensors closer to the ground surface showed a greater release of horizontal pressure than those deeper down. We also noticed that the pressure release was a bit higher on the north side of the pit model compared to the west side. Why? Probably because the north side of the real pit was longer and had a larger exposed area after digging, meaning its own weight had a bigger impact.
But down at the bottom of the pit? A whole different story! The vertical pressure release there was much larger than the horizontal release on the sides. And it didn’t just ease off – it increased sharply, almost exponentially, as we dug deeper. This showed us how the soil beneath the pit was reacting to the removal of the weight above it.
The maximum pressure releases at the bottom sensors happened during the final excavation stage, right before the deepest supports were fully effective. This kind of real-time data from the model is invaluable for understanding the complex stress changes during such deep excavations.

Wrapping It Up: Mission Accomplished (for the Material!)
So, what’s the bottom line? We successfully developed an optimum similar material specifically for that tricky PAL round gravel, using a smart mix of ingredients and the orthogonal test method. We figured out which ingredients were most sensitive to controlling the material’s density, strength, and stiffness. We even peeked inside with microscopy to understand the physical reasons behind its properties, confirming that using dolomite sand was a good call for matching the gravel’s characteristics.
Applying this material in the 3D physical model test of the ultradeep foundation pit worked beautifully. It allowed us to accurately simulate the excavation process and, crucially, reveal how the stress field in the surrounding soil responds. We saw the horizontal pressure release on the sides and the significant, rapidly increasing vertical pressure release at the bottom.
This study gives us a solid reference point and some good inspiration for developing similar materials for other types of gravel formations, especially those with weaker properties. It shows that with the right approach to material development and model testing, we can tackle even the most challenging underground construction projects with more confidence. Pretty neat, huh?
Source: Springer