Giving Ancient Stones a New Lease on Life: Are Nano-Materials the Secret Weapon for Limestone?
Okay, let’s dive into this fascinating world of saving ancient stones! You know how it is, these archaeological limestone artifacts, they’ve been through a lot. Imagine them buried for centuries, soaking up moisture and salts from the soil. It’s a tough life! So, when they’re finally brought to light, like the pieces from King Ramesses III’s gate, excavated way back in 1974 from the Heliopolis Temple in Cairo, they’re often in a pretty fragile state. They were taken out and then, believe it or not, just left outdoors at the same site, battling Cairo’s weather – the heat, the changes in humidity. That’s a recipe for some serious stone drama!
The big challenge for us restorers is figuring out how to best consolidate these limestone treasures. We need to understand what they’ve become after all that time underground – their structure is often unstable, and they’re usually loaded with salts. So, the main goal of our research was to find the best consolidating materials, ones that are just right for these special limestone pieces that have that unique history of being buried for so long. We needed materials that could stand up to all sorts of environmental conditions.
First things first, we had to get a good look at the ancient stones from King Ramesses III’s Gate. We investigated them, analyzed their condition, and even figured out a percentage of damage by comparing them to fresh, pristine limestone that hadn’t faced any of those harsh conditions. It’s like giving the stone a full medical check-up!
Then came the experimental part. We wanted to see how effective some traditional materials and some newer nano-composite materials are at beefing up these stones. We tried out three main consolidating solutions:
- Paraloid B72 (a well-known acrylic resin) dissolved in acetone at 3%. This is kind of a classic in the field.
- Calcium hydroxide nanoparticles mixed into that Paraloid B72 solution, at concentrations of 1% and 3%.
- Nano calcium carbonate, also mixed into Paraloid B72, again at 1% and 3% concentrations.
To see which one did the best job, we used a bunch of cool techniques: a scanning electron microscope (SEM) to see things super up-close, measured the water contact angle (how much the stone repels water), checked for any color changes, and tested their physical and mechanical properties. And guess what? The nano materials generally came out on top compared to just Paraloid B72. The star of the show, giving us the best results, was the nano calcium carbonate mixed with Paraloid B72 at a 3% concentration. Pretty exciting stuff!
The Heart of Ancient Egypt: Heliopolis and Ramesses III’s Gate
Let me paint you a picture. Cairo Governorate holds the remains of the Heliopolis Temple, a place dedicated to the sun god – a massive religious hub in ancient Egypt. Heliopolis itself is ancient, like, pre-dynastic era ancient! It really boomed under the Old, Middle, and New Kingdoms. But, as history goes, much of it is now destroyed, its stones sadly reused to build Cairo in the Middle Ages.
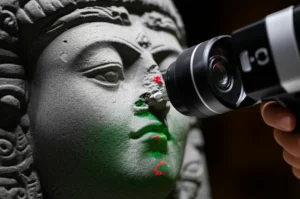
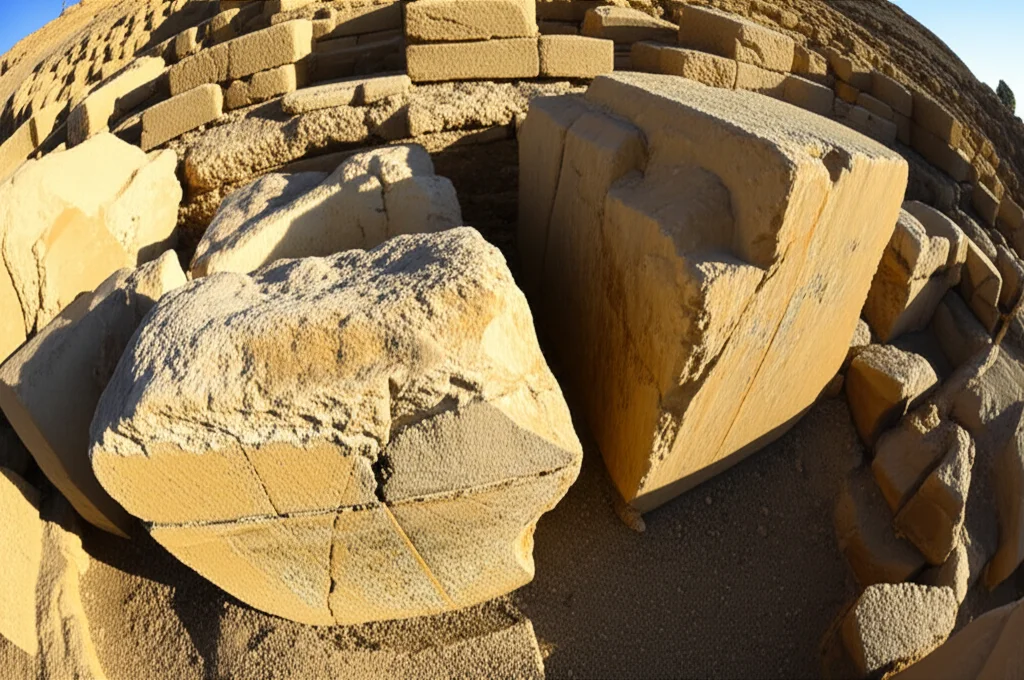
King Ramesses III’s gate, or as some call it, the site of the Great Sphinx (not the Great Sphinx, but another one!), is tucked away in the Al-Mataria district. It’s a bit of a trek from downtown Cairo, about 20 km. This site was a discovery by Professor Dr. Abdel Aziz Saleh during Cairo University’s excavations in 1974. It’s super important because it tells us a chunk of the history of the New Kingdom – it was the grand entrance King Ramesses III built for the Heliopolis Temple. Imagine walking through there! The site has some amazing stone antiquities: a cool Sphinx-shaped statue, a stone pillar, a couple of limestone cornices, and other bits and pieces that were all part of the gate’s architecture. They even named the site “the site of the Sphinx” because of that distinctive statue. It’s incredible to see photos from when it was first discovered and how it looks now.
The Culprits: What’s Damaging These Ancient Stones?
Now, let’s talk about what these poor stones are up against. Deterioration factors are the villains in our story.
- Humidity and Salts: Fluctuations in relative humidity are a big one. When humidity is high, salts within the stone can dissolve. When it drops, they recrystallize. This constant dissolving and recrystallizing puts immense stress on the stone, kind of like tiny wedges pushing it apart from the inside. And limestone, being quite porous, just loves to soak up moisture from the air. This also encourages microorganisms to grow, and they produce acids that, you guessed it, eat away at the stone.
- Temperature Changes: Temperature swings cause the stone to expand and contract. Over and over again, this weakens the bonds between the mineral grains that make up the stone. Eventually, you start seeing cracks, and bits can flake off as scales or layers.
- Atmospheric Pollution: The Sphinx site isn’t immune to modern life. Increased human activity means more pollution – nitrogen oxides, carbon oxides, sulfur oxides. These can dissolve in rainwater, forming acidic solutions. And when these acidic solutions meet limestone (which is primarily calcium carbonate), they react, causing the stone to lose its natural properties and basically dissolve away.
These artifacts are still at the excavation site, surrounded by these threats: groundwater, humidity and temperature changes, pollution, and even human-caused damage. It’s clear they need urgent help with restoration and conservation.
Nanotechnology to the Rescue?
This is where things get really interesting. Nanotechnology is a relatively modern tool in the conservationist’s kit, and it’s proving to be a game-changer. We’re talking about using materials at the nano-scale (that’s incredibly tiny!) for all sorts of treatments: cleaning, strengthening, re-assembling broken pieces, and even sterilizing to stop those pesky microorganisms. It’s also used for preventive measures, like inhibiting microbial growth, creating self-cleaning surfaces, and protecting against UV rays and humidity.
The beauty of using nanomaterials for consolidation, especially in limestone, is their size. Because they’re so small, they can penetrate deep into the stone quickly and efficiently. They have a much larger reactive surface area, which means they can do a better job of improving the mechanical and chemical properties of the treated stone, all without messing up the original archaeological surface. That’s a huge plus!
Choosing Our Champions: The Consolidants
So, why did we pick the specific nano-composites we used?
- They’re relatively easy to get hold of and can even be prepared in the lab.
- They’re quite safe to work with.
- Crucially, they have a similar mineral composition to the limestone we’re trying to save. It’s like giving the stone something it recognizes.
- And honestly, there haven’t been a ton of experimental studies on using these particular nano-materials with limestone that’s been excavated, so we saw a chance to fill a knowledge gap.
Our lineup included:
- Paraloid B72: This is a traditional workhorse in conservation. It’s a copolymer of methyl acrylate and ethyl methacrylate. It comes as clear, colorless crystals and dissolves in solvents like acetone. We prepared a 3% solution in acetone for our tests.
- Nano Calcium Hydroxide (Ca(OH)₂): This is one of the most important nanomaterials used for strengthening in archaeology. We mixed it at 1% and 3% concentrations (by weight/volume) with our 3% Paraloid B72 solution.
- Nano Calcium Carbonate (CaCO₃): This was also used at 1% and 3% concentrations with the Paraloid B72.
Setting the Stage: The Experimental Grind
To do this right, we needed good samples. We got limestone (described as moderately fractured, hard, yellowish to brownish-white, with nummulites – cool little fossils – and some siliceous nodules, from the Eocene epoch) from the Tura quarries, which are about 15 km north of Cairo. These quarries have a long history, providing stone for many ancient Egyptian monuments!
We cut these limestone tiles into small cubes, 3x3x3 cm, following the American Society for Testing and Materials (ASTM) standards. Then, we divided these cubes into groups and gave them codes:
- (P) for Paraloid B72 treatment.
- (P.C) for Nano Calcium Carbonate mixed with Paraloid (at 1% and 3%).
- (P.H) for Nano Calcium Hydroxide mixed with Paraloid (at 1% and 3%).
- (a.g) to denote samples after they went through an aging process.
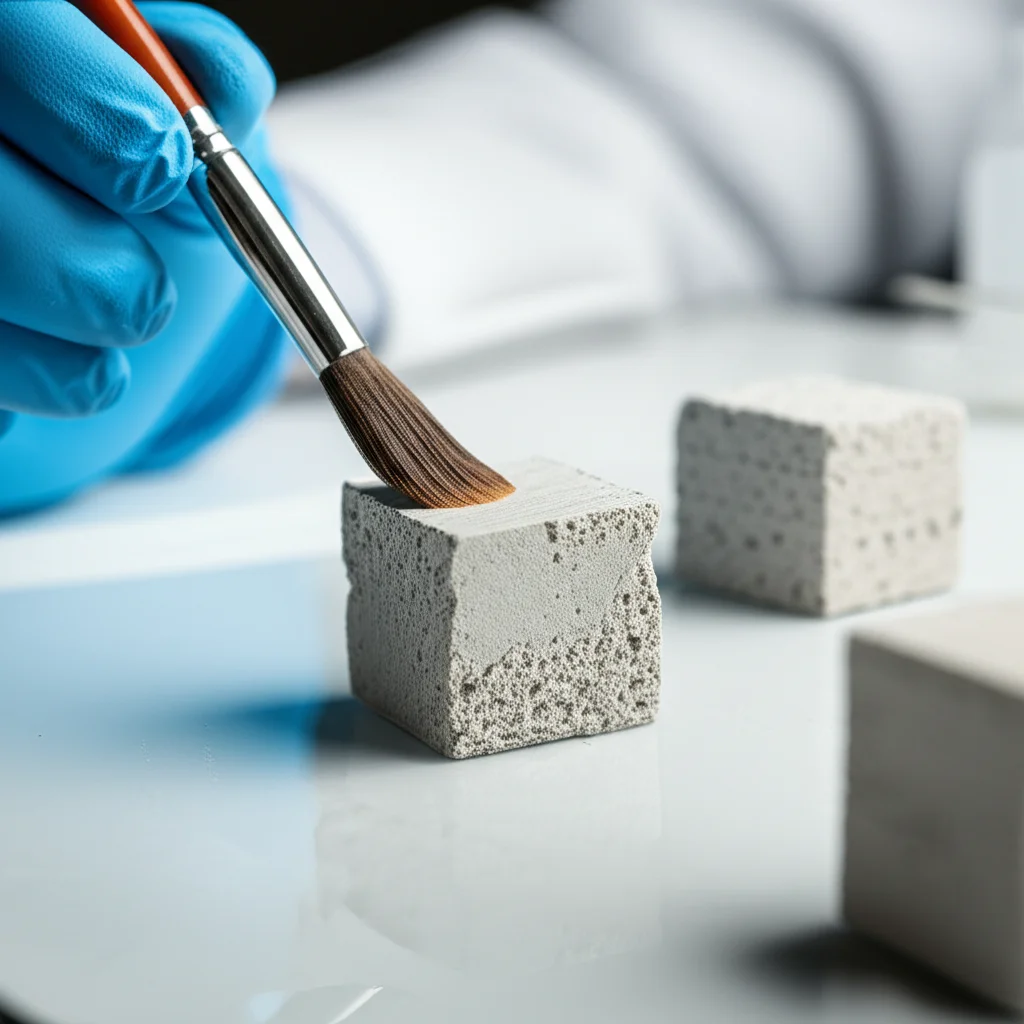
To kick off the experimental study, we prepared 40 of these limestone cubes. First, we measured their initial physical and mechanical properties. Then, the crucial step: artificial aging. We needed to make our fresh quarry samples resemble the weathered archaeological stones from King Ramesses III’s gate. This was done at the Housing and Building Research Center. The samples were immersed in a 7% saline solution (sodium chloride and sodium nitrate) for 8 hours. Then, into an oven at 100°C for 8 hours. Followed by air drying for another 8 hours. We repeated this cycle for three consecutive days. You could really see the difference – the cubes looked older, a bit more fragile. We even saw salt crystals forming on the surface, which we carefully removed before applying the consolidants.
One interesting note: when we were dispersing the nanomaterials in the polymer using an ultrasonic device (a fancy sonicator that helps mix things super well), the nano calcium hydroxide seemed to dissolve faster and easier than the nano calcium carbonate. And the cubes coated with calcium hydroxide looked a bit better and stronger initially. Little observations like these are all part of the process!
The Showdown: Applying Treatments and Testing Like Mad
After aging our initial set of cubes, it was time to apply our consolidant solutions. We used a brushing method, carefully coating the cubes. We had groups of cubes for each treatment type.
Then, for some of these treated cubes, it was back to the “weathering chamber”! We put them through more aging cycles to see how well the consolidants held up over time, mimicking further exposure to harsh conditions. This is super important to understand the long-term effectiveness.
So, what exactly did we measure?
- Physical Properties: We looked at density, porosity (how many empty spaces are in the stone), and water absorption. These tell us a lot about the stone’s internal structure and how it interacts with moisture. We followed ASTM standards for these tests.
- Mechanical Properties: Archaeological stones face various loads and pressures that can weaken and destroy them. So, testing compressive strength (how much force it takes to crush the stone) is vital. We used a big compression testing machine for this.
- Water Contact Angle: This measures how hydrophobic (water-repelling) the surface of the stone becomes after treatment. A higher angle means better water repellency. We used an optical tensiometer for this, placing a tiny water drop on the surface and measuring the angle.
- Color Change: We definitely don’t want our treatments to drastically change the color of the ancient stone! We used a portable colorimeter to measure color before and after treatment, and after aging, calculating the ΔE value (which quantifies color difference). An ΔE below 5 is generally considered acceptable.
- Scanning Electron Microscope (SEM) and EDX: The SEM let us see the microstructure of the stone at incredible magnification – the grains, the pores, and how the consolidants interacted with them. We could see if the materials penetrated well and connected the grains. EDX (Energy Dispersive X-ray Analysis) coupled with SEM helped us identify the elemental composition of the stone and the treatments.
We also did XRD (X-ray diffraction) on actual stone samples from the King Ramesses III site to identify their mineral components, confirming they were indeed limestone (CaCO₃) with some other minor minerals.
Drumroll, Please… The Results!
Alright, let’s get to the juicy part – what did all this testing tell us?
Water Absorption and Porosity: Keeping the Bad Stuff Out
When it came to water absorption, the samples treated with Nano calcium hydroxide at 3% showed the best results initially, reducing water absorption significantly (down to 5.2%). The Nano calcium carbonate at 3% was also very good (5.3%). These nanomaterials, with their tiny particle size, are great at penetrating the stone’s pores and blocking water entry. The 1% concentrations were okay, but not as good. And poor old Paraloid B72 on its own? It allowed the most water absorption (6.2%).
Even after aging, the nano-treated samples held up well. Nano calcium carbonate 3% was now slightly better (5.4% absorption) than nano calcium hydroxide 3% (5.5%). Paraloid B72 really struggled after aging, with absorption jumping to 7.8%. This lines up with other studies that show nano-calcium carbonate can reduce porosity and increase cohesion.
For porosity, it was a similar story. Nano calcium hydroxide at 3% gave the lowest porosity (11.96%), meaning it filled up those internal voids really well. Nano calcium carbonate at 3% was a close second (12.45%). Paraloid B72 alone left the stone the most porous (14.26%).
After aging, the nano-treated samples were still the least affected. Nano calcium carbonate 3% (12.63% porosity) and nano calcium hydroxide 3% (12.65%) were neck and neck. Paraloid B72 samples became much more porous after aging (17.70%).

Mechanical Properties: Making Stones Stronger
This is a big one – how much stronger did the treatments make the limestone? The clear winner here was Nano calcium carbonate at 3%, which boosted the compressive strength significantly (an increase of 113.8% relative to a baseline, or achieving a final strength indicated by 113.8 g/cm³ – the study implies a large improvement!). Nano calcium hydroxide at 3% also did very well (85.4 g/cm³ or % increase). This shows these nanomaterials are really effective at getting into the pores and beefing up the stone. The 1% concentrations were less impressive. And Paraloid B72? It gave the weakest mechanical improvement (56.7 g/cm³ or % increase), probably because it didn’t penetrate as well.
After aging, Nano calcium carbonate at 3% still reigned supreme in mechanical strength (104.9 g/cm³ or % increase), followed by nano calcium hydroxide at 3% (78.4 g/cm³ or % increase). Paraloid B72 samples were the weakest after aging (52.2 g/cm³ or % increase).
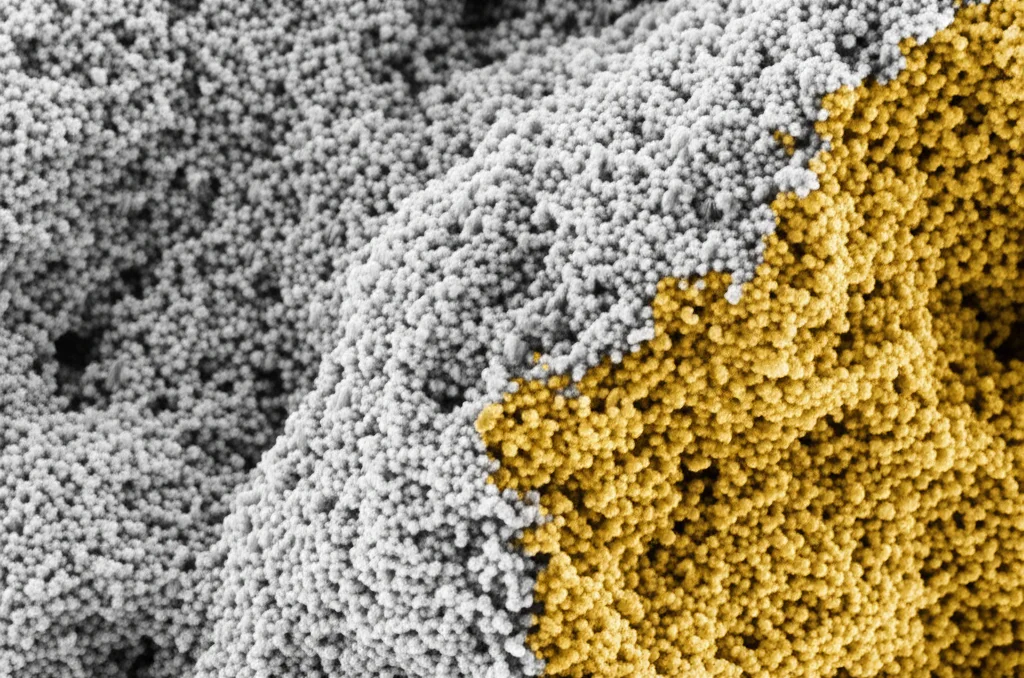
A Microscopic View: SEM-EDX Insights
The SEM images were fascinating! The original, untreated stone showed fine, interconnected micrite grains. The EDX confirmed it was mostly calcium, oxygen, and carbon (CaCO₃). After artificial aging, you could clearly see salt crystals (chlorine and sodium from the NaCl used) and a decrease in the original limestone elements.
Samples treated with just Paraloid B72 showed good initial distribution of the consolidant. However, after aging, a lot of that protective layer was lost, and the salts reappeared.
Now, for the nano-heroes: Samples consolidated with 1% nano calcium carbonate (P.C1%) and 1% nano calcium hydroxide (P.H1%) gave good results, and they held up reasonably well against aging. But the 3% concentrations were the real stars. The sample treated with Nano calcium carbonate at 3% (P.C3%) gave the best results, especially in its stability against artificial aging cycles. The SEM showed the consolidant penetrated well and coated the grains effectively. The sample with 3% nano calcium hydroxide (P.H3%) was also very good, showing high percentages of calcium, oxygen, and carbon (from the consolidant and stone) compared to the nasty sodium and chlorine salts after aging. This really highlights the efficiency and durability of these nanomaterials at 3%.
The Angle on Water Repellency
The contact angle measurements backed up what we saw with water absorption. The untreated stone was like a sponge, with a very low contact angle (21.3°), meaning water spread out and soaked in easily. After aging (with salts), the angle increased a bit (34°), probably because the salt crystals changed the surface.
Paraloid B72 treatment significantly improved water repellency (angle of 70.5°). After aging, it dropped slightly to 67.3°.
Nano calcium carbonate at 1% started strong (92.9°), but after aging, it dropped quite a bit (68.6°), suggesting it wasn’t as stable.
But hold onto your hats for Nano calcium carbonate at 3%! It made the surface incredibly water-repellent, with a contact angle of 110.8°! That’s fantastic. And even after aging, it was still very good at 88.4°.
Nano calcium hydroxide at 1% gave an angle of 70.9°, dropping to 63° after aging. The 3% concentration was better (79.5°), but also dropped to 63.9° after aging.
So, for water repellency and stability, Nano calcium carbonate at 3% was the clear champion in this study.
Keeping it Real: Color Change
The good news on the color change front is that all the treatments were within the acceptable range. None of them caused a color change (ΔE) of more than 5, which is the general threshold. In fact, after aging, the nano calcium carbonate at 3% showed the least color change, recording a ΔE of just 0.95. That’s excellent, as we want to preserve the original appearance as much as possible.
The Grand Conclusion: Nano is the Way to Go!
So, after all that meticulous work, what’s the big takeaway? Well, it’s pretty exciting stuff!
It’s clear that nano materials are a significant step up from traditional consolidants like Paraloid B72 for these kinds of weathered archaeological limestone.
Specifically, nano calcium carbonate at a 3% concentration (mixed with Paraloid B72) emerged as the top performer. It did the best job of increasing both the physical and mechanical properties of our limestone samples, especially holding up strong even after those tough artificial aging cycles.
Both nano calcium carbonate and nano calcium hydroxide at 3% were much better at penetrating the pores and sealing the surface of the limestone compared to their 1% counterparts. The water contact angle results really showed this.
And importantly, our lab study didn’t show any major downsides to consolidating with nano calcium carbonate, like surface clumps or cracks.
Of course, we always have to be a bit cautious. Lab conditions are controlled. Applying this in the field, on actual monuments, might present different challenges. That’s why we’d always recommend testing the chosen consolidant on small, selected areas of the actual stone artifacts on site. This helps verify its efficiency and spot any potential issues before a large-scale application.
But overall, the results are incredibly promising. It feels like we’re getting closer to having even better tools to protect these irreplaceable pieces of our history, like the magnificent gate of King Ramesses III, ensuring they can inspire awe for generations to come!
Source: Springer