Printing Life: How We’re Building Tissues with Bio-Based 3D Scaffolds
Hey there! Let’s chat about something pretty cool we’ve been working on. You know how everyone’s talking about sustainability these days? Well, it’s not just a buzzword; it’s becoming super critical for everything we do, including some cutting-edge stuff like building tissues for medical use! We’re diving deep into how we can combine the power of 3D printing with materials that are actually *good* for the planet and our bodies. Think of it as giving nature a little helping hand with some high-tech tools.
Why Bio-Based? It’s All About Going Green
For ages, we’ve relied on plastics made from oil, right? Great for lots of things, but not so great for Mother Earth. The environmental footprint is just too big. So, there’s this massive push to find materials from renewable sources – stuff like vegetable oils, cellulose, or lactic acid. And honestly, vegetable oils are fantastic candidates. They’re cheap, they’re friendly to the environment, and their fatty acids have these neat structures that we can tweak. We can turn them into things like bio-based acrylics, which are super versatile. It’s all about using what nature gives us in a smarter way.
3D Printing: Building Layer by Layer
Now, pair those cool bio-materials with 3D printing, also known as additive manufacturing. This technology is a game-changer! Instead of carving or molding, you build an object layer by layer, adding just the material you need. This means way less waste, faster production, and saving energy and time. It’s like having a magic builder that only uses the exact amount of bricks required. This is especially exciting for medicine, particularly in personalized treatments and, you guessed it, tissue engineering.
Scaffolds: The Homes for Cells
In tissue engineering, we often need a structure – a scaffold – to help cells grow and form new tissue. Think of it as a temporary, custom-built house for cells. These scaffolds need to be 3D, porous (so cells can move around and get nutrients), and they absolutely have to be biocompatible (meaning cells like living on them) and biodegradable (so they disappear once the new tissue is formed). Getting the right balance of porosity and pore size is key to making sure cells can really thrive inside the structure.
DLP Printing: Tiny Details Matter
There are different types of 3D printing, and one we’re particularly interested in uses light to cure liquid resins into solid shapes. This is where technologies like Stereolithography (SLA) and Digital Light Processing (DLP) come in. DLP is pretty neat because it uses a projector to flash an entire layer at once, making it fast and capable of creating really intricate structures with high resolution – down to microns! This kind of precision is way beyond what some other 3D printing methods can do, which is crucial when you’re trying to mimic the delicate structures of biological tissues.
The challenge with DLP for tissue engineering has been finding the right resins – ones that cure well, are biocompatible, and break down safely. Traditional photoinitiators (the stuff that makes the resin cure when hit by light) can sometimes leave behind toxic bits. That’s why we looked at using polymeric photoinitiators, which are bigger molecules less likely to wander off and cause trouble.

Crafting Our Bio-Resin Mix
So, what did we cook up? We started with acrylate bases derived from bio-based fatty acids – sustainable stuff! We also added polyethylene glycol dimethacrylate (PEG DMA) to help with things like viscosity, making it easier to print. For the photoinitiator, we went with a polymeric one to keep things as biocompatible as possible. We chose one that works with the 385 nm light source of our DLP printer. The idea here is to make sure the curing process doesn’t leave behind anything nasty that could harm cells later on.
The Porosity Boosters: Coconut Oil and PEG
To get those crucial porous structures and help the scaffolds break down over time, we added either coconut oil or polyethylene glycol (PEG) to our resin mixes. We made two main formulations: one with coconut oil (let’s call it BP-1) and one with PEG (BP-2). The plan was to print the scaffolds and then wash out the coconut oil or PEG. This washing process would leave behind pores, creating that spongy structure cells need. Plus, adding these components from renewable sources fits perfectly with our sustainability goals.
Dialing in the Cure: Getting It Just Right
Getting the curing process perfect is vital. If the resin doesn’t cure enough, the scaffold falls apart. If it cures too much, it can become brittle or trap unreacted chemicals. We used a cool technique called Photo-DSC (Differential Photocalorimetry) to watch exactly how our resins cured under UV light. This let us figure out the best light intensity and exposure time for our specific formulations. We found that PEG actually helped speed up the curing process compared to the coconut oil formulation. Based on these tests, we aimed for a curing conversion of over 85% to make sure our scaffolds had good structural integrity.
Printing the Future: Our DLP Setup
With our optimized resin formulations and curing parameters, we moved to the 3D printer. We used a DLP printer with a 385 nm light source. Now, the standard print bed and resin tank were a bit too big for the small, delicate scaffolds we wanted to make, which caused some issues. So, we actually modified the printer! We made a smaller glass resin tank with a non-stick silicone bottom (so the cured layers peel off easily) and a smaller aluminum print bed that we roughened up with a laser to help the first layers stick better.
We printed layers just 50 microns thick – that’s thinner than a human hair! We used a higher intensity and longer exposure for the first few layers to make sure they stuck firmly to the print bed. For the main scaffold structure layers, we used our optimized settings (45 W/cm² for 13 seconds). We also programmed the print bed to move very slowly and gently between layers to avoid damaging the delicate structure as it was being built. Keeping the resin temperature constant at 35°C throughout the print was also important.

Post-Processing and Preparation: Cleaning Up
Once the printing was done, we had these amazing 3D structures on the print bed. But they still had some uncured resin clinging to them and, importantly, the coconut oil or PEG we added for porosity. So, we carefully washed them multiple times with ethyl alcohol, even using an ultrasonic bath to make sure we got everything out. After washing, we dried them in an oven and then gave them a final post-curing under UV light to make sure they were fully solidified and stable. The scaffolds from the coconut oil formulation were named BP-1sld, and those from the PEG formulation were BP-2sld. We stored them safely until it was time for the really important part: testing them with cells!
Checking for Biocompatibility: Are They Cell-Friendly?
Before putting cells directly on the scaffolds, we needed to make sure the materials weren’t toxic. We did this by making extracts from the scaffolds – basically soaking them in cell culture medium – and then exposing mouse fibroblast cells (a common cell type used for testing) to these extracts at different concentrations. We used a standard test called the MTT assay to measure how many cells survived. The good news? Both BP-1sld and BP-2sld extracts showed no toxic effects, with cell viability well above the acceptable limit. This told us that our scaffolds provide a safe environment for cells to hang out in.
Do Cells Like These Homes? Testing Attachment and Growth
Okay, so the scaffolds aren’t toxic. But do cells actually want to live on them and grow? This is where the real magic happens! We seeded L929 fibroblast cells directly onto our sterilized BP-1sld and BP-2sld scaffolds. We used a special coating on the petri dish to make sure the cells *only* attached to the scaffolds. Then, over 7 days, we used a CCK-8 assay to measure how many cells were attaching and proliferating (multiplying) on the scaffolds.
Here’s where things got interesting: Cells *did* adhere to both types of scaffolds. However, we saw significantly *more* cell proliferation on the BP-1sld scaffolds (the ones made with coconut oil) over the 7 days compared to the BP-2sld scaffolds (the ones made with PEG). While cells stuck to BP-2sld, they didn’t multiply much. This suggests that BP-1sld might be particularly good for applications where cell growth is a priority. We’re still digging into why BP-2sld didn’t support proliferation as well, but it could be better for applications needing long-term structural stability rather than rapid cell growth.

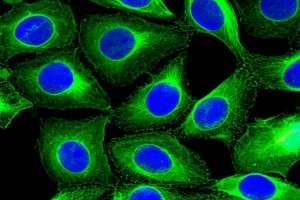
Seeing is Believing: SEM Images
To get a closer look at how the cells were interacting with the scaffolds, we used a scanning electron microscope (SEM). The SEM images were super helpful! They confirmed that the cells were indeed sticking to the scaffold surfaces and, importantly, they looked healthy – maintaining their normal shape. The images also lined up perfectly with our cell proliferation results from the CCK-8 assay. The BP-1sld scaffolds showed lots of cells spread out and happy, while the BP-2sld scaffolds had fewer cells attached. These visuals really solidify our findings and give us confidence that these scaffolds are doing what they’re supposed to do: providing a structure for cells.
What We Learned: A Sustainable Path Forward
So, what’s the takeaway from all this? We successfully developed photopolymer resins using bio-based materials – a big win for sustainability! By adding coconut oil or PEG, we were able to create porous scaffolds using precise DLP 3D printing. We figured out the best printing conditions using Photo-DSC, which is a smart way to save materials and reduce waste.
The BP-1 formulation (with coconut oil) seemed to hinder UV penetration a little during curing, but that actually helped create more porosity after washing, which in turn boosted cell adhesion and proliferation. The BP-2 formulation (with PEG) cured slightly better and maintained its structure longer in degradation tests, but didn’t support cell proliferation as much in our specific tests.

Both formulations, combined with DLP printing, offer exciting, eco-friendly possibilities for tissue engineering. This work shows that we can integrate sustainability into advanced medical applications, benefiting both human health and the environment. It’s an important step towards creating implants and tissue structures that are not only effective but also kind to the planet. We’re really excited about the potential here and plan to keep exploring how these scaffolds work with different cell types and eventually, in living systems. Stay tuned!
Source: elt;a href=eldquo;https://link.springer.com/article/10.1007/s10924-025-03592-7erdquo;egt; Springer elt;/aegt;